Woodblock Friend Project
|
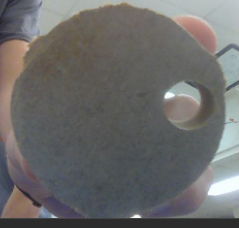
The goal of this project was to use the wood in the classroom and the tools such as the belt sander, drill and driver, and miter saw, to create a wood figure.
|
|
I got inspiration from the easter island stone statues. I didn't have any eyes, just an eyebbrow, and I added a big nose. I didn't want to use any glue on the project, so I used the drill and driver to make a hole through the back of the body and then I screwed the nose in through the back. I did the same thing for the mouth and the eyebrows.
|

|

|

|
Cam Smiley Face
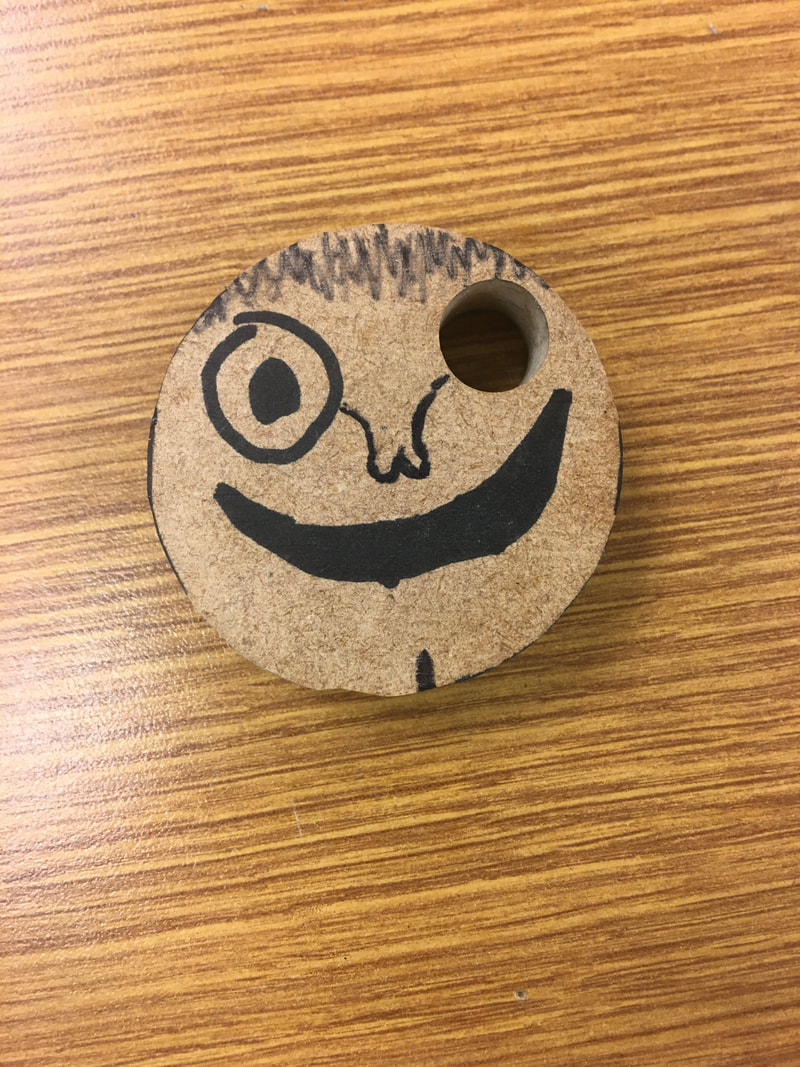
The goal for this project was to design a face on fusion 360, a 3d modeling and design software, and then make g-code from the design and use a CNC router to cut out the figure.
|
The goal for this project was to design a face on fusion 360, a 3d modeling and design software, and then make g-code from the design and use a CNC router to cut out the figure.
I designed the smiley face on fusion 360, but I didn't realize that the mouth was too small for the cutter, so it didn't cut the mouth out. The cutter should have been big enough for the smaller eye, but it still didn't cut there no matter what I did so I only managed to cut out the circle on the outside and the one eye
|
|

I then used a sharpie to make the eyes and mouth, making a different face on each side

|
|
Student Choice Project #1
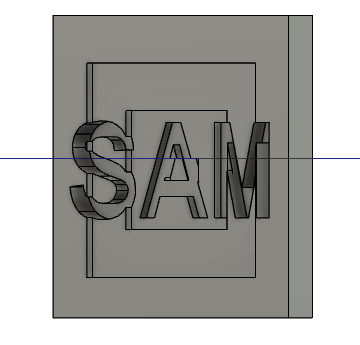
My goal for this project was to design a nameplate on fusion 360 and then use the CNC router to cut it out.
|
I initially made a small rectangle on fusion 360 so it would fit on the small wood blocks that were in the class. I didn't want to make it too complicated because I didn't want the CNC to take a really long time to cut it out, so I made a design with rectangles within rectangles with my name in the middle. When I cut it out, the name went all the way through, which I didn't intend to happen, so the depth of the wood block was measured incorrectly. Fortunately, the name is still visible, and now, when somebody asks me my name, instead of using the effort to say it, I can just go home, get the nameplate, and go back and show it to them, savig a lot of time and effort.

|

|
Student Choice Project 2
By: Sam and Parker
Project: We are making a car that can drive using a joystick controller. This will be accomplished by using a microbit and coding the joystick to control the motors.
Constraints:
-We had roughly three weeks to complete project
-We had only the materials in the classroom
-We had only the software on our school computers
-We had roughly three weeks to complete project
-We had only the materials in the classroom
-We had only the software on our school computers
Prior Knowledge: Before this project we worked in class using micro bits and arduinos as well as using many different peripheral devices during the microcontroller sprint, this gave us the basic knowledge to base the code for the car off of and the knowledge of how the joystick device worked.
Design Proposal:
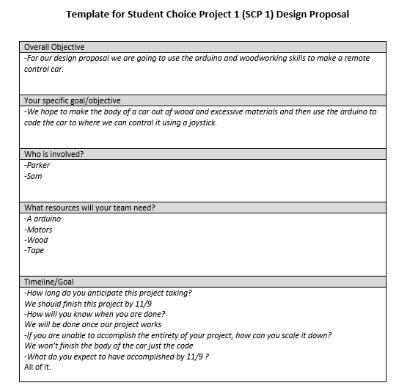
Design Proposal Preliminary Sketch:
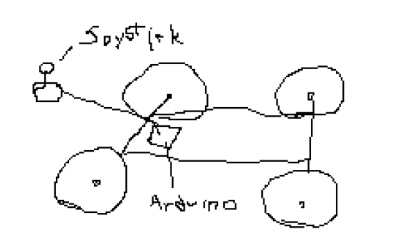
Planned Timeline: Our initial plan was to complete the code, make the frame of the car, and connect it to the motors in the first week. In the second week, we planned to connect another motor to make the car able to turn in the second week, and the finish up any other problems in the thrid week of the project.
Building Process:
1. First, we started on the code. For the code we needed to program a joystick to make a motor turn on. We struggled with this because the micro bit was not working right, but it worked when we got a new microbit.
2. After we got this we put a wheel on the motor in order to test this, but the motor was not strong enough and this is where we experienced a mild struggle.
3. Then we tried to apply more power to the motor by attaching it to a battery pack. When we do this it requires more fixing of the code.
4. After this did not work, we attempted to find a new motor. We also started making the base of the car that we could put the wheels, microbit, and motor on. We made this fairly quick and easily before we had to continue to work on the code.
5. We found a new motor that worked and finished the code so that the joystick would control the motors.
6. We began attaching the wheels, motor, joystick, and microbit to the car.
Images:
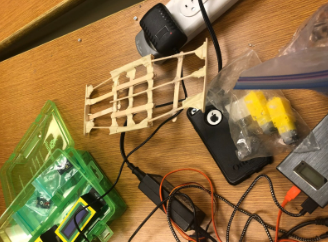
This is the base of the car so that we can put the microbit and joystick on.
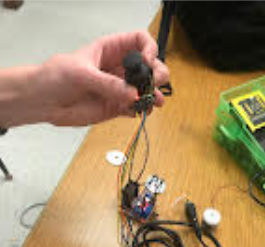
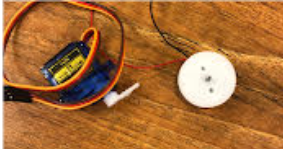
This is the joystick to control the car.
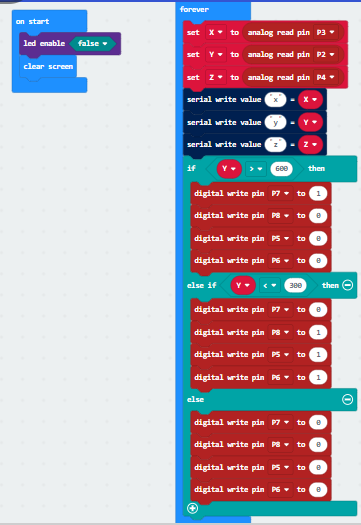
This is our code for the car.
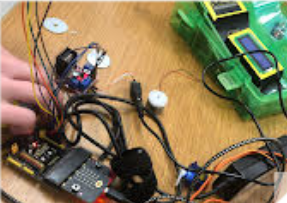
This is the wiring of the microbit.
These are the first two motors we tried, they were too weak.
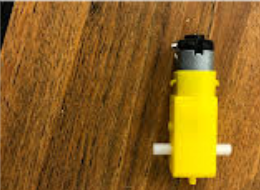
This is the motor that we ended up using.
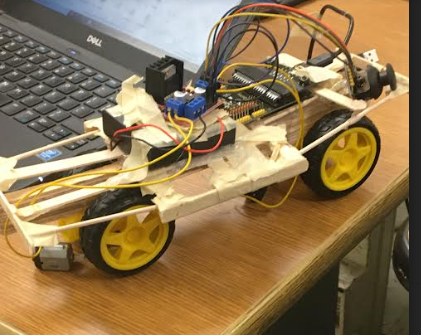
This is the final assembled car
How it works: The code assigns the values of the different directions of the joystick to different variables, up and down are assigned to y, and left and right are assigned to x. The initial value of y is around 400, the max is 800, and the min is 0, and the code makes it so if the y value is higher than 500, then the motors spin forward and if the y value is less than 300 then it spins backwards
Testing: Our project did not live up to the initial expectations. When we finished the code we realized that the motors either do not have enough power to spin the wheels or the power supply did not have enough power to make the motor spin
This project allowed us to learn how to solve problems in coding and using Micro Bit parts. The things that did not go well were the motors. They caused confusion and consistently did not have enough power to move the wheels.
This project allowed us to learn how to solve problems in coding and using Micro Bit parts. The things that did not go well were the motors. They caused confusion and consistently did not have enough power to move the wheels.
Effects of Constraints on the Project: The limited time and the lack motors that were powerful enough to make the wheels start spinning made creating the project much more difficult and prevented us from being able to finish the project. We were also unable to find something to make the car be able to turn within the time constraint of the project.
Actual Timeline: It took around two days to make the initial code as well as the frame of the car, but it ended up taking almost two weeks to find the correct motors that would work for our project and then modify the code to work with the motors. We spent three more days trying to find a power source that wasn't too heavy and that could power the motors, and we still couldn't find any that could make the motors start spinning by themselves. Putting the car together took another day.
Team Aspect: I worked with Parker Allen, and while I worked on the code and tried to get the motors to work, he made the frame of the car and helped me connect the microbit and other components to the car and helped me whenever needed while also documenting the project as we went.
Final Project
Our last project of this semester was to clean out part of the void(which is a storage room within the classroom.)
Our goal for this project was to clean off the top of the main shelf as well as clean the back shelfs and organize and label the materials.
We organized the screws, the resistors and cleaned off the shelf. We found all the big batteries and put them all on the same shelf. We also cleaned out several boxes and organized them on a shelf so they could be used later.
We went through every shelf and organized everything to go together as best as possible.
We swept the floor and threw away the dirt and put away the other things we found on the floor.
Pictures:
